
Importing multiple images into indesign data merge
In this post, I will cover how to format an excel document for data merging multiple images, how to import image directories from a folder into excel, and the fundamentals of data merge for those who’ve never worked with it before.
What is Data Merge?
Data Merge is a panel in InDesign that allows you to quickly create variations of a document by inserting lines of text and images from a text document or spreadsheet. This function can be used to create hundreds of variations upon mailing address labels, employee business cards, and anything else with a predetermined design and variable content.
Spreadsheet setup basics
First things first: we need a data source. The easiest way is to create a spreadsheet in Excel with all of the separate information fields necessary. InDesign will recognise anything in the first row as a category name, and anything listed below it as content to be entered into the InDesign document.
To make sure the spreadsheet file is readable by indesign, you need to save it as a CSV file. Side note: the CSV UTF-8 format will not work, so be mindful to select “CSV (comma delimited) (*.csv)” specifically when exporting from Excel.

Implementing Images with
your spreadsheet
For Indesign to find the image files to import, you need to have a column with all the file paths, and for row one to be formatted properly.
Row one formatting
The top row of this column needs to be preceded by an @ for InDesign to view the column information as an image directory as opposed to another text column. Since @ is used for functions in Excel however, the only way to do that is to add an apostrophe or quotation mark before the @. If everything is formatted correctly, row one should look something like ‘@images. The apostrophe or quotation mark may hide itself automatically. If this happens, don’t worry. The mere fact that you have the @ in the text field means that it should work fine.

Image path formatting
InDesign searches file paths relative to the location of the datasource file, which in this case is our excel document. For the sake of simplicity, I’d recommend placing your datasource within the folder containing all your images. That way, simply putting the file name and extension will find the correct file (john-smith.jpg).
If your image files are stored in such a way that this isn’t possible, then you can put the full directory which would likely look something like
(C:\Users\[your name]\Documents\Images\john-smith.jpg). Obviously though, this will vary depending on where the files are saved.
Importing images into excel
It is possible within Excel to import the file names and directories from a folder, which may be convenient if you’re working with lots of images.
If you do intend on importing image data into excel, I would recommend doing it before adding any other information as images are always imported in alphabetical order. Even if you have an alphabetized list of names, if just one photo associated with a name is missing, then all the names listed after will be paired with the wrong image. Additionally, do not have your datasource file saved to this directory yet, as it will also be imported which could misorder the images as well.
To import image directories in excel, go to the data tab at the top of the page and press the “Get Data” button. This should prompt a dropdown menu from which you should select “From file” and then “From folder.”
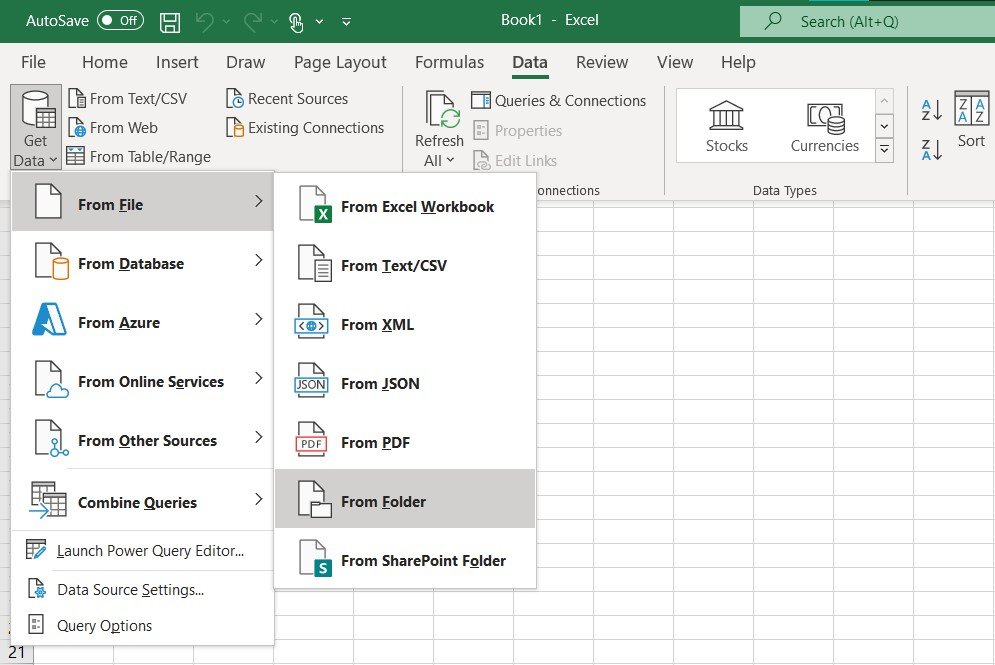
After selecting your image folder, Excel will show all of the data imported, most of which is of no use to us. To remove the additional columns, click “Transform data.”

from this menu, simply select the columns you don’t need and delete them. If you intend on putting your excel file within your image folder, then the only column you need to import is “File Name.”
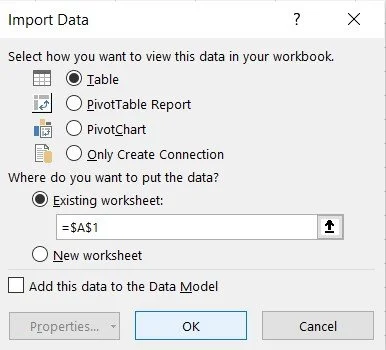
To import to an existing Excel document, click the “close and load” button in the top left, and then in the drop down, “close and load to…”
Be sure to select “existing worksheet” and enter the column and row where you want the imported data to start. If you have it selected before entering the data import menu, it will automatically fill this category with that box location.
Assuming that everything went properly, your document should look similar to the following:

Don’t forget to change the first row of your imported data to include the ‘@ at the beginning.
Connecting data to indesign
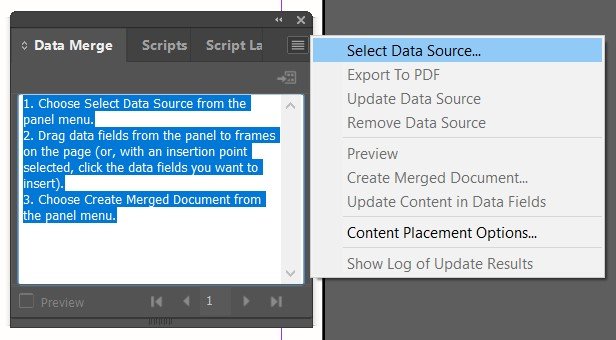
Once your datasource is ready for import, go to the Window tab, and under the utilities dropdown option, select data merge. In the data merge window, click the small, barred box in the top right, and then click select data source and navigate to the file location.

Now you’re pretty much done! All there is left to do is to add the data into the layout. For text, simply select the area of your textbox you want the information to fill, and select the corresponding option in the data merge panel. For image, all you need to do is select an image frame and click the image option in the data merge panel, or drag and drop the image option directly to the box you want it to go into.

Click the preview button to make sure that all the images display correctly, and all your text boxes are sized appropriately for your text fields.

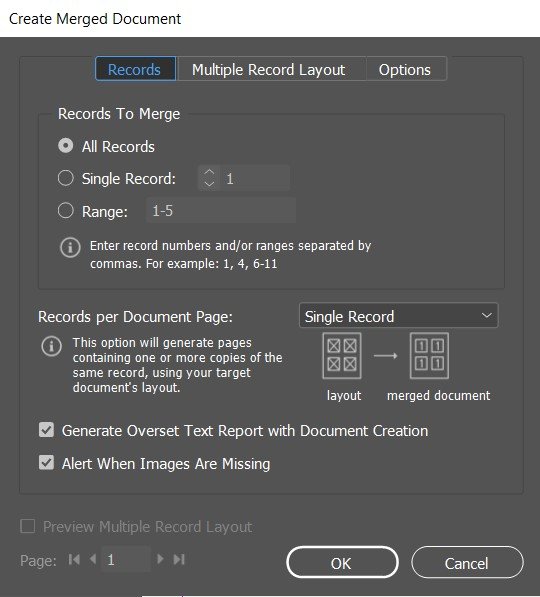
Once you’re ready to export, select the data merge menu option to the right of your source file name. This will open the “create merged document” menu which provides a lot of options such as image fitting settings, and also the option of having multiple data rows on a single sheet.
After exporting, InDesign will create an entirely new file with your generated layout that you’re free to modify page by page as you see fit. Your original source file remains perfectly intact, so if the need arises to generate the same document with different or additional data, you don’t have to recreate your file from scratch.